Do you want to make money with minimal effort? Of course you do! Redbubble has allowed me to make thousands through largely passive means with a little bit of creative elbow grease. (That header image is my own screenshot. I’ve made almost $2,000 in the last twelve months alone!) The best part is that anyone can set up an account and start earning– and although an artistic eye is a plus, it’s not required.
Written from my own personal experience, this guide will explain in detail how to get started creating and selling through Redbubble.
Disclaimer
This is NOT a get-rich-quick scheme by any means. Making money on Redbubble takes time and practice. Here’s a screenshot of what my first twelve months of payments looked like:
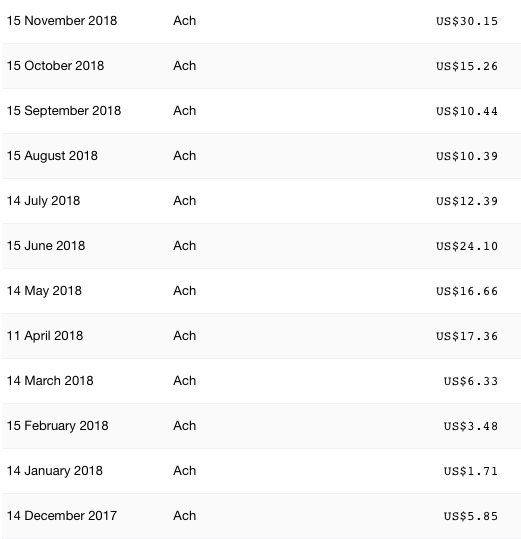
And keep in mind this was before Redbubble instituted a $20 payout threshold. Today, it would have taken me about five months before I actually saw any money in my bank account, and I wouldn’t have sold the minimum amount to get paid every single month, either.
However, $20 in your bank account is better than $0 in your bank account! If you’re willing to keep investing small amounts of time and creative energy, you’ll quickly start to see returns. At the time of writing, my best month on Redbubble (March 2020) earned me $393.44. It may have taken me almost three years to make that amount in one month, but nearly $400 is still a boon anyone can appreciate.
Now, let me explain how I did it.
Redbubble: The Least you Need to Know
Redbubble is an e-commerce site where independent creators can upload designs onto a variety of home decor products, decorative pieces, stationary, or apparel which anyone may purchase. Some popular items right now include stickers, cloth face masks, t-shirts, tote bags, button pins, and mugs. Go ahead and browse my shop and explore some featured designs now to get an idea of what sort of products and designs you can create!
Setting up a storefront on Redbubble is as simple as going to Redbubble.com and making an account. Once you enter the necessary details for payment under your account settings, you’re ready to start making money!
Note that uploads do not have to be particularly sophisticated. I discovered this myself when I searched up the term “theatre” on the site and discovered most of the top-selling designs using that keyword were plain text or simple illustrations. If you can use some nice fonts or make some simple art, you can make money on Redbubble.
What Tools do I Need?
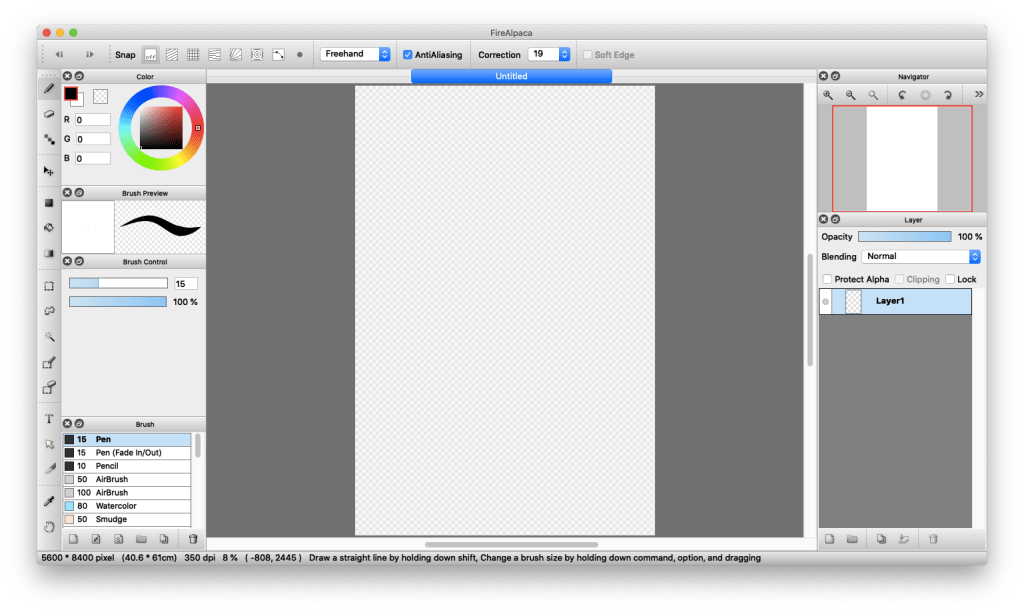
The most important basic tool you’ll need (besides a device that can access the internet, of course) is an art program of some sort.
My free recommendations are (1) FireAlpaca, (2) GIMP, and (3) Krita. (Though a computer of some sort is heartily recommended, if you’re working from a tablet or smartphone, free options include Autodesk Sketchbook, Adobe Illustrator Draw, or Tayasui Sketches.) Once you’ve had some success, you may consider upgrading to Photoshop or Clip Studio Paint– however, the free program FireAlpaca has been my bread and butter since day one and I still prefer it over Photoshop!
I recommend playing around in whatever tool you choose to figure out what each of the buttons do. If you need help, there are many guides and video tutorials online for using each of the programs I’ve listed.
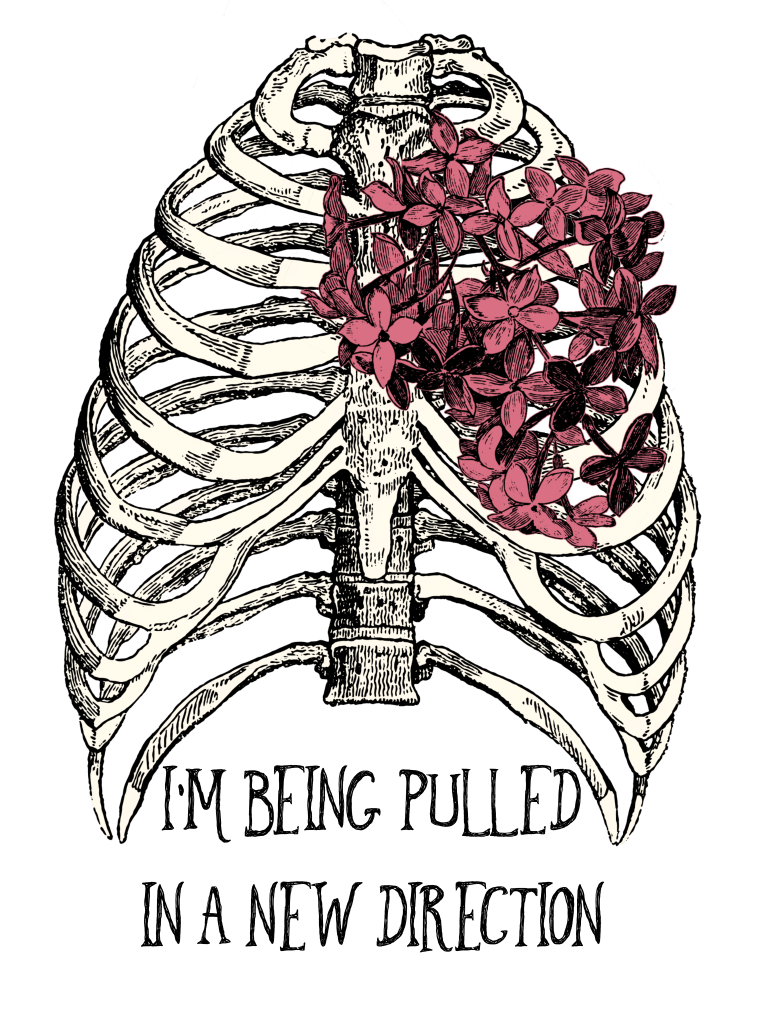
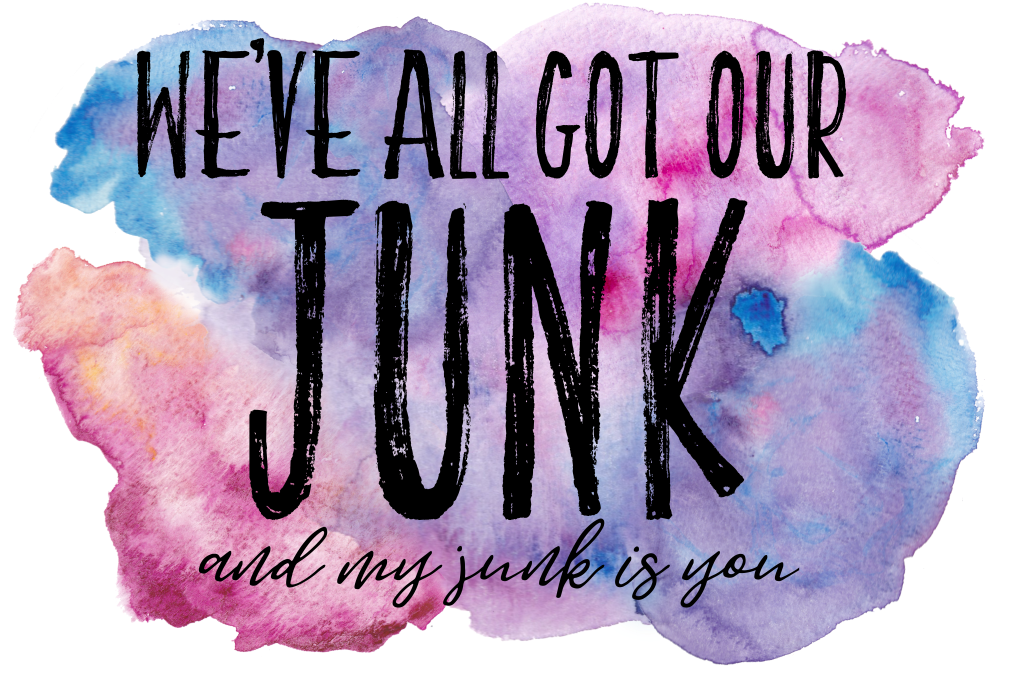
Very helpful, though not required, are downloadable fonts and design elements that you can arrange to create more appealing uploads. I started out by looking for free fonts on DaFont and 1001FreeFonts. These will look a little nicer than the default fonts on your device, however, it’s important you check the fonts are free for commercial use– many on these sites are only free for personal use. Once I earned a bit from Redbubble and had a little extra capital to spend, I started picking up sets of fonts, textures, and other elements from sites like Mightydeals and DesignBundles. From these sites, you can purchase pre-made illustrations or designs which you can use in your own artwork. This way, you can give your creations some artistic flair, without having to actually draw anything yourself. Here’s a collection of seemingly complicated uploads I created through arranging and editing purchased elements, without personally drawing anything:


Again, I must stress the importance of only using downloadable elements that you are allowed to use for commercial purposes. Your uploads may be removed and your account deleted otherwise.
Nonetheless, as you can see, smart use of the tools available to everyone can make Redbubble a potentially profitable hobby for all!
What Should I Upload?
An age-old question: What should I make? I can’t tell you exactly what you should do, but here are a few suggestions:
- Start with what interests you. It’s more fun to create things you like! That’s why I’ve stuck almost exclusively with creating and uploading theatre-related works!
- Ask yourself, what would I want to purchase? And use that as inspiration!
- Anything can make a good product! Funny quotes, proverbs, memes, fandom merch, stylish patterns, illustrations, or abstract art pieces can all sell!
- It’s sometimes helpful to look around at what others are creating for inspiration. However, ensure you’re only taking inspiration from others and not simply copying designs or ideas.
- Looking at what others are creating can also tell you what not to make. If thousands of other creators are making and uploading the same kinds of designs, yours probably won’t stand out. For example, if you search “animals” on Redbubble, you’ll see over one million results. It’s hard for designs to get seen, let alone purchased, when you’re facing that much competition! Generally, the more niche the idea, the better.
- Casting a wide net will help catch more fish. In other words, upload a lot! As I stressed in the previous point, it is helpful to stick with niche designs, but even if you don’t think your idea is extremely unique, upload it anyway! I also often post multiple designs with the exact same quote, and upload alternate versions of designs in multiple colors. You never know when a small change might make the difference between a favorite and a sale!
Creating Designs: Getting Started
Once you’ve got some ideas for designs, you can start creating! Before you even get into the artistic work, here are a few tips on file formatting:
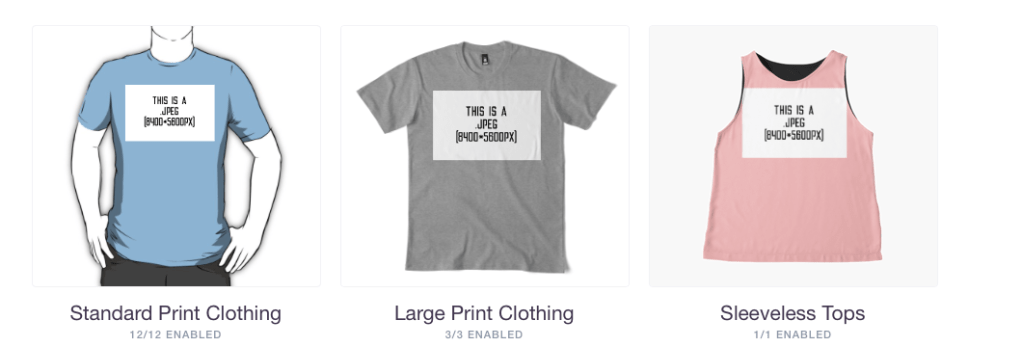
- The most versatile file type when uploading to Redbubble is a transparent .png file. Since .jpg files can’t have a transparent background, they don’t look very attractive unless you’re uploading a full illustration. If there’s going to be any “white space” around your design, consider opting for a .png file instead. You can see the difference between a .jpg (top) and a .png (bottom) below:
- Note that your .png won’t be transparent unless you make it transparent by deleting the background. You’ll know your file is transparent if the background displays as gray and white checks, shown below. If you’re unsure how to do this you can find tutorials for creating transparent files online.
- When creating designs, it’s best to use two standardized file sizes: one for upright (vertical) designs and one for portrait (horizontal) designs. I find using two different file sizes is more versatile than only using one.
- You should keep standardized file sizes so uploading copies of previous work is easy. When uploading to Redbubble, you can copy a previous listing to automatically use the tags, description, and (most importantly) formatting of a previous piece on your new upload. This can save a LOT of time, even if you have to make some tweaks. I never upload a new listing– basically everything I upload is a “copy”.
- Make sure your standard file size is big enough! You can size down a large design via the upload formatting page, but you can’t size up a small design. My uploads are always 16×22 inches (5600×8400 pixels), which is even larger than I need most of the time!
- Note that larger file sizes will slow down older computers, take longer to upload, and require more storage space on your harddrive. Experiment to find the file size that suits your uploading needs while also accomodating your digital limitations.
- When designing, visibility and readability are your friends! Avoid making things that are too small or too light or dark to read. I’ll touch upon this point again in the next section.
- As mentioned in the previous section, you should continually be thinking about the kinds of uploads you would personally want to purchase. While designing, ask yourself if you would buy what you’ve made. If the answer is no, you may want to revise your design. (However, as previously stated, you should always cast a wide net– so while you shouldn’t upload anything you think looks outright bad, don’t be afraid to upload whether you love a design or not.)
Uploading Your Design
The uploading process on Redbubble is mercifully simple, even for beginners. (This is the reason I mainly use Redbubble versus other popular sites like TeeSpring and Society6.) However, there are many mistakes beginners make which can become cumbersome to fix later. Maximize your success by uploading with wisdom the first time! Here’s my best advice as a Redbubble veteran:
- ALWAYS double-check product formatting. By default, Redbubble will place your design in the center of every product, which isn’t always desirable: On t-shirts, this means your design will be roughly across the stomach, and on hardcover journals, the design will be straight across the spine. Redbubble is also poor at recognizing the best sizing for your upload, and so ensure the entire design is visible on the product! If the design bleeds outside the formatting “area,” it will be cut off.
- As previously stated, copying a previous listing is far faster than uploading a new one every time. Take advantage of this setting!
- Ensure you add tags and a description to every upload, and always use a relevant title. All of these will help your design be seen by potential customers, as these provide keywords used to display your design in searches on Redbubble and in search engines like Google as well as in Redbubble ads.
- Your description can be generic. I often copy and paste one line of every description nearly verbatim from product to product, with a few small changes to be relevent. Sometimes I follow this with a detailed description of the design I’m uploading. For instance, here’s my description for a recent upload:
- Quote from the song “Move Toward the Darkness” from the Addams Family Musical. A perfect keepsake for musical theatre and drama club directors and staff! Perfect for cast gifts! This design makes a great present for all theater nerds! Design features a watercolor scene depicting a mountain range covered in trees. Over the illustration are the words “let each foreign forest offer you its rain” in a white cursive font.
- You should use as many relevant tags as possible. For my theatre uploads, I use plenty of generic tags (to name a few, “musical theatre,” “singing,” “acting,” “dancing,” “Broadway”), a few more specific ones about the design I’m uploading (like “quote,” “[song/show title],” “watercolor”). You can use up to 50.
- Ensure you stay under your 50 tag limit or the upload will error and you’ll have to start the upload process over!
- Your description can be generic. I often copy and paste one line of every description nearly verbatim from product to product, with a few small changes to be relevent. Sometimes I follow this with a detailed description of the design I’m uploading. For instance, here’s my description for a recent upload:
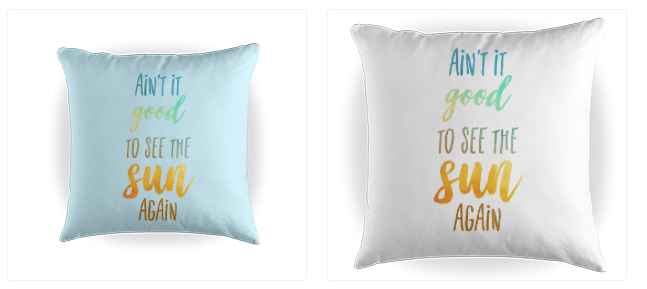
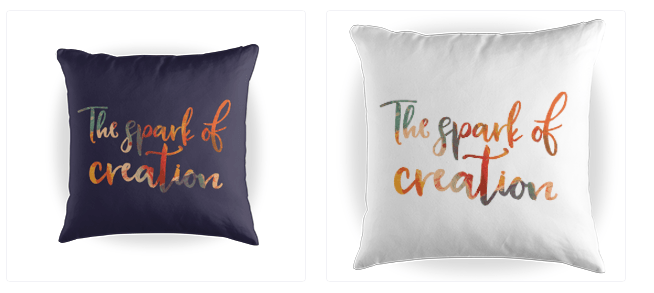
- Assign a background color to your uploads as much as possible. The default plain white background looks amateurish and not very appealing. Even plain black is better than plain white, though color can also look great! Experiment with the color picker! Below are a few examples of my own uploads with and without background colors. Note how picking a dynamic background color can make the design feel more special and “pop” more:

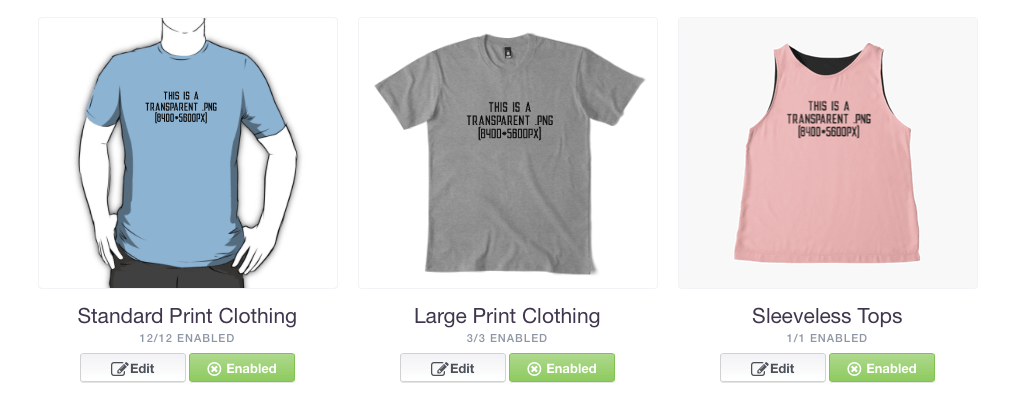
- As I mentioned in the previous section, pay attention to the visibility of your design. Disable products on which your design won’t be visible! For example, white or very light text usually doesn’t show well on stickers, water bottles, and cotton tote bags. Disable those products if you don’t think the design will be visible!
- Once again, however, you want to cast the widest net you can. Generally, strive to keep as many products enabled for each design as possible!
Other Miscellaneous Tips for Redbubble Success
- It took me over a year to make more than $100 in a month. However, you’ll find your Redbubble income is almost always on an upward trend!
- Every time a product is sold, favorited, or commented on, your design moves up in the “popular” search queue. In other words, when you search for a keyword on the site (like say “animals”), the first designs you see are typically the most popular and highest selling. Thus, the more you sell, the easier it is to sell going forward!
- Putting similar uploads into collections increases the chance you’ll sell multiple products at once and your other designs will be seen more easily.
- Some designs look good on products but fail to catch shoppers’ attention in the small thumbnails shown in your store or in search results. Generally, larger, clearer designs sell best for that reason— but don’t be afraid to upload whatever you want!
- You’ll always see a bump in sales around the holiday season. Therefore, get your stores stocked before November and December!
- You can also manufacture a second “booming season” by uploading seasonal designs. For instance, I upload many theatre-related designs that make good cast gifts upon the completion of shows. Because of this, I see a massive increase in sales before and during high school musical season (March and April, usually). You can also see this kind of boom with sports-related or holiday-themed uploads. Keep experimenting!
- I find my Redbubble income generally remains roughly the same (if not increases) even when I’m not regularly, actively uploading. Therefore, you can leave your account alone and make money entirely passively once you’ve got some nice things uploaded.
- … However, generally, I add at the very least one new upload per month, and would always encourage sellers to continually bulk up their portfolios.
- Redbubble’s “pay day” is the 15th of the month. With direct deposit enabled, it has never taken more than 5 days to see my money in my bank account. Woohoo!
