Practicing outside of rehearsal is necessary in order to do your best work in a musical. Many actors take recordings during music rehearsals so that they can practice on their own later. This is great, but as a busy person, and I often find that I don’t have time to review those recordings I made with such conscientious aims. Those recordings end up going un-reviewed, and so they mostly just clog up space on my phone.
What I have discovered as a busy person who is often on-the-go is that my commute is a great time to review. To use this time, however, I need a rehearsal track that I can use hands-free while driving. If I were to sit at home and practice, I could just search through the recording manually to find the parts I need– but I obviously can’t do that and drive at the same time.
Enter my preferred new method! It takes some time, but it’s worth it, and I learn my parts well. I also end up with a resource that is easy to share with my whole cast!
Here is how I make my own practice tracks in Audacity:
- Step 1: Record your music rehearsal
- Step 2: Import the recording to Audacity
- Step 3: Cut out everything but the voice parts
- Step 4: Export to your phone
- Step 5: And practice
Step 1: Record your music rehearsal
You can either use a built-in audio recording function on your phone (iOS comes with the “Voice Memos” app), or download something special. I use the app “Voice Record Pro.”
Be sure to place your phone somewhere neutral, where it won’t pick up a lot of background noise– for instance, you don’t want it in your lap if it’s going to catch a lot of sound from you picking up and putting down your music or turning pages. I usually just put it on the floor under my chair, away from my feet so I won’t step on it.
Record the entire rehearsal. Feel free to pause the recording during any breaks, but just don’t forget to restart it when you start singing again!
Step 2: Import the recording to Audacity
You can use a different program if you’d like, but Audacity is my preferred. It’s free and quite easy to use. For this step, I send the recording from my phone to my laptop (usually I AirDrop it, but you could also use any number of cloud or messaging routes), but you could also edit the audio right on your phone if you wanted. Voice Record Pro has the ability to do this, I just find it easiest to do the editing on a computer where I have finer control.
Step 3: Cut out everything but the voice parts
Comb through your recording in your audio editor. You want to delete any idle chatter and silent “dead space” to create a recording that is concise and straight to the point. Think of it like making a “highlight reel” of the rehearsal, keeping only the important parts. I like to keep some of the music director’s instructions so that the audio makes sense in context: Ie, I’ll keep things like “Look at page 53… at measure 37, altos sing…”
You can also edit out repetitions. If the music director plays the alto part 3 times to teach it, maybe only keep one. You can always simply replay that section of the audio if you need to review. I even cut out extraneous words for brevity. If the director says “Okay, um, next the altos come in here, uh, and they sing…”, I will cut it down to “Next the altos come in, they sing…”
You can be as granular or basic about this as you want. The point is to take the long rehearsal and cut it down so that it is short and easy to review and understand. I have edited 3-hour rehearsals down to only 15 minutes before.
Audacity makes this very easy to do. After importing your audio, you’ll see something like this:
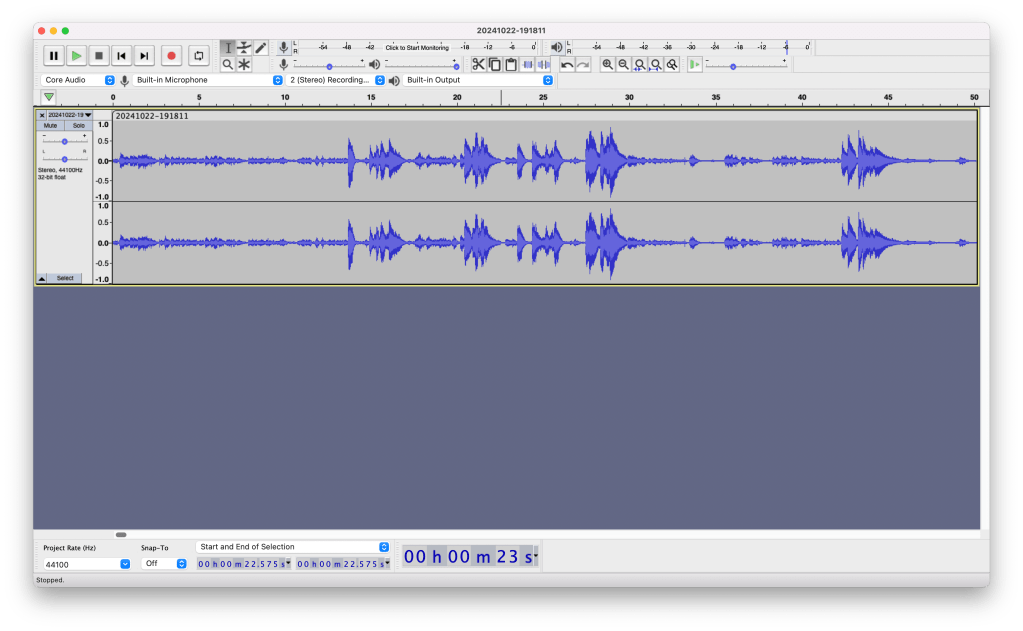
Be sure to “zoom in” so that you’re able to review the audio quite closely: the numbers across the top of the working area are seconds. I am sometimes trimming out individual seconds of audio (or less) while working on these recordings.
The areas where people are singing is usually easy to spot, as those are the places where you see the tall “spikes.” Areas of relative silence are also easy to see, as they’ll look like flat lines. Regular speech will fall somewhere in between these.
Listen to the recording and pause occasionally to cut out unnecessary parts. If you zoom in and watch closely, you’ll be able to “see” the words being said in Audacity. You can select where a word starts and ends by simply clicking and dragging, and delete that section by pressing the “delete” key.
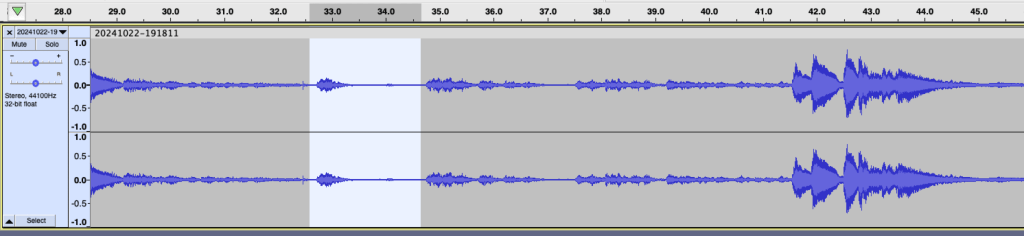
In this picture, I’ve selected the music director saying “um” followed by a second of silence to cut it out of the recording. I played the recording and was able to easily “see” the um in the track, as well as the silence that followed– trimming it makes the recording just a little cleaner and more concise.
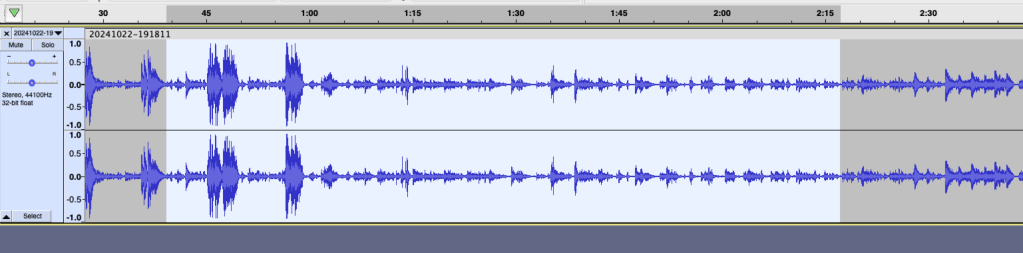
It’s not all that granular, though– here’s almost a minute and a half that I’m cutting. You can see there’s a bit of us singing at the beginning (just a repetition of something we’d done before) followed by a lot of talking. No need to keep that! Select it all and delete.
The downside here is that you pretty much have to listen to the whole recording while you’re editing it. It’s time consuming. The upside of that is that it helps you learn, though!
Ultimately, this is your recording to do with as you see fit. You can choose whether you want to keep all the voice parts, or only your own. You can decide how much chatter you want or how much repetition you want. I like to trim my recordings to be as neat as possible while keeping all the voice parts, so I can share the recording with the whole cast– I started doing this as a stage manager making rehearsal resources for my actors! I also like to keep at least one run of the entire song in the file.
I like doing this because you can hear how things sound with your cast. Unlike with canned practice tracks, you don’t have to worry about the recording not making sense to you based on what you experienced in rehearsal– it’s literally your rehearsal! You can also hear how your music director wants things done, and can get an ear for how your own soloists are choosing to time their choices.
There are certainly easier ways to record a music rehearsal, but I think my way has a lot of benefits!
Step 4: Export to your phone
Once your recording is freshly trimmed, give it a final “proof listen” and then export the file. You can save this as an .mp4 file for audio listening, or turn it into a .mov file so it can be uploaded to a cast page, such as a Facebook group. The idea, anyway, is to have the file somewhere you can use it easily.
Step 5: And practice
Your practice track is done! You should now have a track with which you can simply press play and review your music completely hands-free. This is perfect for reviewing in the car on the way to rehearsal– or work, school, or anywhere else you have to go. You can also, of course, sit down with your music and play this track while you practice at home.
Here’s an example of a practice track I made for our cast during a production of Legally Blonde.(Featuring a meme I made from a rehearsal pic… lol.)
I hope this is useful for other performers!
